Saving settings for an application can be a common task in development. There are several ways to do so and I found the following article a very good read. There are up and down sides for every way of saving settings, and I won’t go into detail into this. What I want to blog about is how an application page can be set up as a settings page for a certain application.
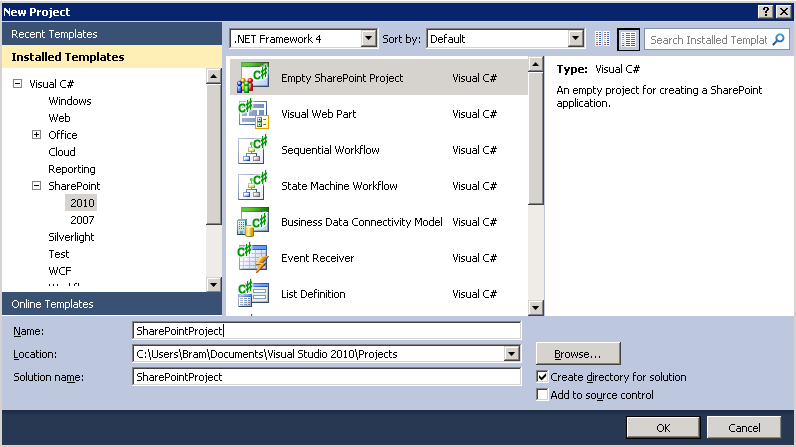
Firstly, create a new empty SharePoint project in Visual Studio.
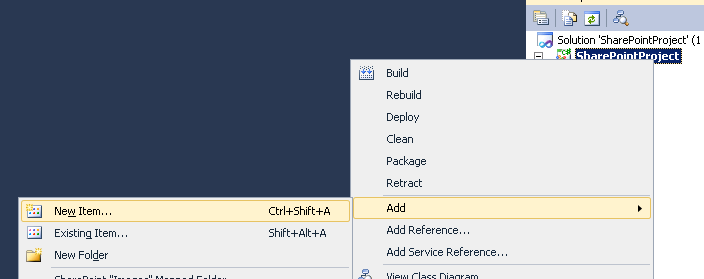
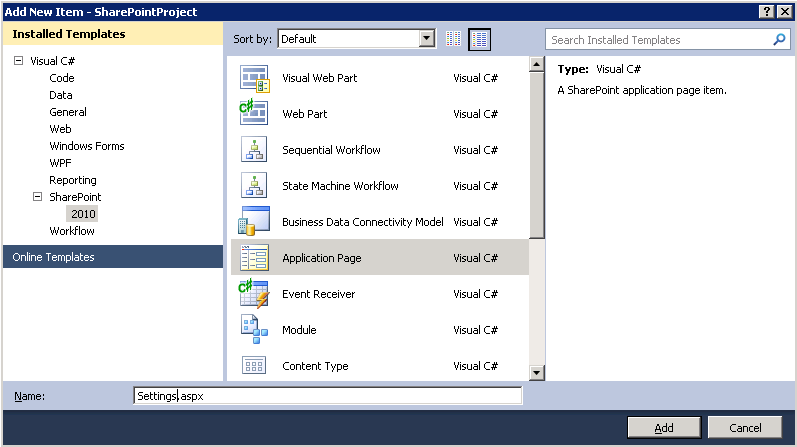
Deploy as a farm solution. Next, add an application page to the project.
Call the page however you like. In the example I use “Settings.aspx”.
Now that we have an aspx page we can quickly deploy it to our farm by pressing F5. When your browser opens go to http://…/_layouts/SharePointProject/Settings.aspx and the application page will show.
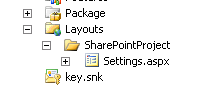
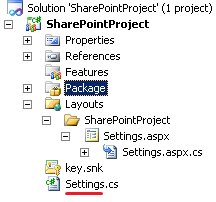
You can find this hierarchy back in your Solution Explorer within Visual Studio.
Close your browser and go back to Visual Studio. Stop the debugging if it’s still up. Next, we’ll add the default SharePoint look & feel to our settings application page. Register the following controls on the settings.aspx page:
<%@ Register TagPrefix="wssuc" TagName="InputFormSection" Src="/_controltemplates/InputFormSection.ascx" %>
<%@ Register TagPrefix="wssuc" TagName="InputFormControl" Src="/_controltemplates/InputFormControl.ascx" %>
<%@ Register TagPrefix="wssuc" TagName="ButtonSection" Src="/_controltemplates/ButtonSection.ascx" %>
There are many articles about these controls and I found this one very useful. With the controls registered we can now place them under the “PlaceHolderMain” tag.
Here’s an example of how these controls can be used. It offers a genuine look and feel from SharePoint:
<table border="0" width="100%" cellspacing="0" cellpadding="0" class="ms-descriptiontext">
    <wssuc:InputFormSection ID="InputFormSection1" runat="server" Title="InputFormSection 1"
        Description="Please enter the correct setting">
        <template_inputformcontrols>
                <wssuc:InputFormControl runat="server" LabelText="Label text 1" ExampleText="Example text 1" LabelAssociatedControlId="txtSample">
                    <Template_Control>
                        <asp:TextBox ID="txtSample" runat="server" Width="100%" />
                    </Template_Control>
                </wssuc:InputFormControl>
            </template_inputformcontrols>
    </wssuc:InputFormSection>
    <wssuc:ButtonSection runat="server">
        <template_buttons>
			<asp:Button UseSubmitBehavior="false" runat="server" class="ms-ButtonHeightWidth" Text="OK" id="BtnSubmitBottom" Enabled="true" OnClick="btn_ok_click" />
		</template_buttons>
    </wssuc:ButtonSection>
</table>
This code translates in the following output:
With the layout page ready, it’s time to add code so we are able to actually store the settings somewhere, and more importantly, read them whenever needed.
Start out by creating a new class, in this example “Settings.cs”:
Add the following using:
using Microsoft.SharePoint.Administration;
Next, inherit SPPersistedObject and build the constructors:
class SettingsObject : SPPersistedObject
    {
        public SettingsObject ()
        { }

        public SettingsObject(string name, SPPersistedObject parent, Guid id)
            : base(name, parent, id)
        { }
    }
Add the following field so we have a place to store and retrieve the setting:
[Persisted]
private string setting1;
public string Setting1
{
    get { return setting1; }
    set { setting1 = value; }
}
We’ll also need 2 methods; The first method will retrieve a settings object, and create one if there’s no object available; The second method will do handle the creation of the settings object. Note that you can also delete the persisted object by using the Delete() method on the settings object.
public static SettingsObject GetSettings(SPWebApplication webApplication)
{
    SettingsObject settings = webApplication.GetChild<SettingsObject>("MyAppSettings");
    if (settings == null)
    {
        return SettingsObject.CreateNew(webApplication);
    }
    return settings;
}

public static SettingsObject CreateNew(SPWebApplication webApplication)
{
    return new SettingsObject("MyAppSettings", webApplication, Guid.NewGuid());
}

protected override bool HasAdditionalUpdateAccess()
{
    return true;
}
Now that is done, all that is left is the communication between the layout page and the settings object. Open the code behind of the layout page and fill in the below code. What it does is, is taking the current web application, retrieve a settings object and fill in the textfield that’s on the layouts page. When someone fills in a new setting it gets saved by clicking OK.
public partial class Settings : LayoutsPageBase
{
    SettingsObject settings;

    protected void Page_Load(object sender, EventArgs e)
    {
        SPWebApplication webApplication = SPContext.Current.Site.WebApplication;
        settings = SettingsObject.GetSettings(webApplication);
        if (!IsPostBack)
        {
            txtSample.Text = settings.Setting1;
        }
    }

    protected void btn_ok_click(object sender, EventArgs e)
    {
        settings.Setting1 = txtSample.Text;
        settings.Update();
    }
}
That’s it for the settings page. When there’s a need of consulting these settings in your application, simply retrieve the object and use its fields.
